Python OpenCV - show a video in a Tkinter window
Posted on April 21, 2018 by Paul
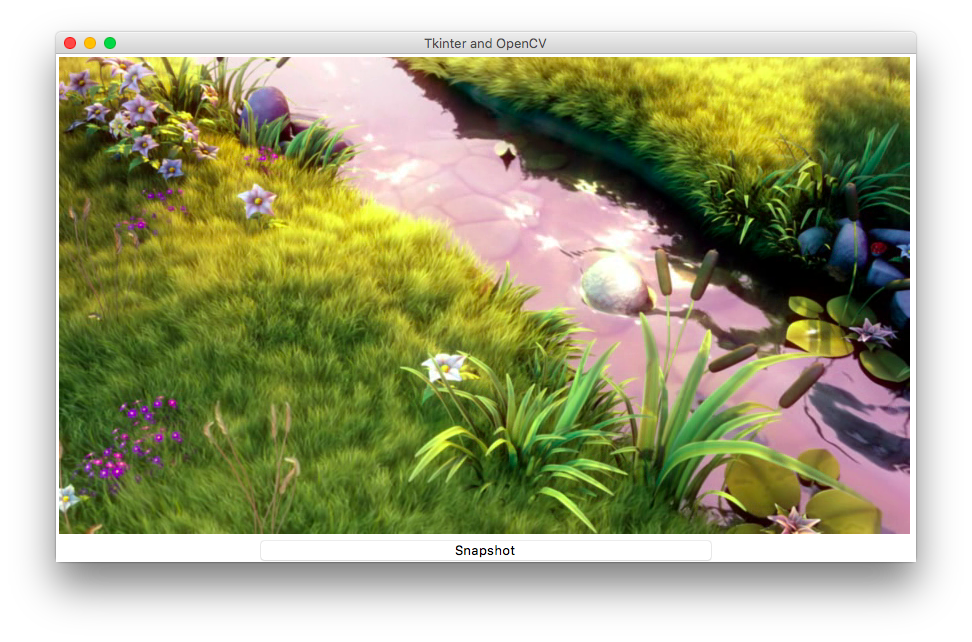
In my last tutorial I’ve shown you how to create a minimal Tkinter application: load an image with OpenCV, plot the image on a Tkinter window and apply a blur filter when the user presses a button. Another interesting application is to show a camera feed or an exiting video on a Tkinter window.
Python OpenCV - show an image in a Tkinter window
Posted on April 20, 2018 by Paul
This is a short tutorial about using Tkinter, the default Python GUI library, with OpenCV. On Windows, Tkinter is bundled with the official Python installer. On Linux, you can install Tkinter using your distribution package manager. The situation is a bit more complex on macOS, that comes with Python 2.7 and an old version of Tkinter, at the time of this writing, the easiest path is to install Miniconda Python 3 that comes with the latest Tkinter.
OpenCV includes some rudimentary GUI capabilities, useful if you need to show a video or an image, get the mouse or the keyboard input. But, if you need something more complicated like buttons, drop down lists, menus, labels, text boxes and so on, you need to use a dedicated GUI library like Qt or Tkinter.
In the remaining of this article, I’ll assume that you have Python 3.6, Tkinter 8.6 and OpenCV 3.3 or newer installed on your machine. If you need help to install the above on Windows, macOS or Linux check my previous articles.
Writing a minimal x86-64 JIT compiler in C++ - Part 2
Posted on January 12, 2018 by Paul
- Part 1 - Generate and use a simple function at runtime
- Part 2 - Call a C++ function from a function generated at runtime
In my last article, I’ve shown you how to generate the machine code for a function at runtime, copy this code in a part of the memory, marked as executable, and call it from C++. Now, we’ll go the other way around, we’ll call a C++ function from a function generated at runtime. Like before, I assume that you try the code on Linux or macOS.
If you remember from part 1, we’ve started by adding machine code instructions in an std::vector and copying this code to an executable memory page. While this was a fine approach from a didactic point of view, in practice, you will probably want to write the code directly to the executable memory. Here is an example of how I propose to do it:
1     MemoryPages mp;
2     mp.push(0x48); mp.push(0xb8);
The object mp, from the above piece of code, will ask the OS for memory, release this memory when it is not needed and will have some helper member functions that will let us push pieces of machine code to the executable memory. We can also add safety features, e.g. a mechanism to check if we can push more data on the executable memory or if we’ve reached the bounds of the allocated memory pages.
Writing a minimal x86-64 JIT compiler in C++ - Part 1
Posted on January 10, 2018 by Paul
- Part 1 - Generate and use a simple function at runtime
- Part 2 - Call a C++ function from a function generated at runtime
In this article, I will show you how to write a minimal, bare-bones, x86-64 JIT compiler in C++ that runs on macOS, Linux and could potentially run on Windows through WSL.
For our purposes, JIT compilation is a technique through which a program generates machine code at runtime, based on the user input. A C++ program is AOT (ahead of time) compiled, which typically means that once the original code was compiled for a particular machine it can’t be changed at runtime (and from a security point of view this is a desirable feature). A simple, useful application, of a C++ JIT compiler is on the fly compilation of a new function that is based on other functions already defined in the original code.
Let’s start with an even simpler example. Write a C++ program that asks the user for his name and generates, at runtime, a function that simply prints a greeting. While not a very practical program (you really don’t need to compile this to a separate function), this example will exemplify how to create and execute code at runtime.
C++17 constexpr everything (or as much as the compiler can)
Posted on December 27, 2017 by Paul
During the holidays I did some catch up with CppCon 2017. One of the titles that I had on my to watch list for a few months now was constexpr ALL the Things! by Bean Deane and Jason Turner. Please note that I wrote most of this article before actually watching the presentation.
The title of the presentation made me curious if I can optimize an old piece of code that used a huge 2D array of coefficients as the initial condition for a long calculation. In order to avoid recalculating the big array of coefficients, I used to keep them in a file and simply load the data in memory every time the code was executed. The promise of using a constexpr was that I could avoid keeping two executables (the code that generated the coefficients and the code that did the actual work) and a data file. Replacing everything with a single binary was interesting and could potentially be faster.
In order to test the above, I devised a simpler model - fill an array with data generated at compile time.
Clang 10 in a Docker container for C++17 and C++20 development
Posted on December 14, 2017 by Paul
Updated 19 April 2020
If you want to try the latest stable version of Clang in a Docker container, you are in the right place. Running Clang in a container has the advantage that it is light on resources and won’t mess with your underlying OS. The last point is especially important if your host operating system is macOS, on which it is a really bad idea to directly install a binary Clang other than the one that comes with Xcode. I’ve tested the approach presented in this article on Windows 10, macOS Mojave and Ubuntu Linux.
I assume that you have Docker installed on your machine, if not go to the Docker website and install it. After the installation, open a Terminal or, if you are on Windows, a PowerShell window and check if Docker was properly installed with:
1 docker versionLinux and WSL - Install Clang 9 with libc++ and compile C++17 and C++20 programs
Posted on December 13, 2017 by Paul
Updated 23 September 2019
In this article, I will show you how to install Clang with libc++ on Ubuntu Linux and Windows System for Linux. Same procedure should work on other Debian based Linux distributions. Latest version of Clang supports the C++17 standard and has experimental support for C++20.
If you want to compile Clang from sources check my previous post.
Alternatively, if you are using Docker, you can install Clang 9 in a Docker container.
Open a Terminal (on Windows 10, you can open a Command Prompt or a PowerShell window and write bash to start WSL) and make sure your system is updated:
Raspberry Pi - Install GCC 10 and compile C++17 programs
Posted on December 8, 2017 by Paul
Updated 10 May 2020
In this article I will show you how to install GCC 10 on your Raspberry Pi system and how to compile C++17 programs. At the time of this writing Raspbian is based on Debian Buster, which comes with the stable but slightly outdated GCC 8.3 as the default C and C++ compiler.
There is also a video version of this tutorial:
If you want to compile GCC 10 from sources check my article.
If you also want to install Clang on your Raspberry Pi, check my article.
Raspberry Pi Raspbian - Compiling GCC 8.1
Posted on December 7, 2017 by Paul
Updated 5 May 2018
This is a short article about compiling, building, GCC 8 from sources and how to get started with C++14 and C++17 on Raspberry Pi with Raspbian. At this time Raspbian comes with the stable but slightly outdated GCC 6.3 as the default C and C++ compiler.
I’ve tested the next steps on a Raspberry Pi 3, but it should work on all current models. Fair warning, compiling GCC from source is a fairly long and intensive process and Raspberry Pi 3 tends to overheat, make sure that you have heat sinks installed or proceed at your own risk. Alternatively, you can use the binary I’ve made, you can can find it on Bitbucket.
The eight queens puzzle in Python
Posted on November 20, 2017 by Paul
The eight queens puzzle, or the eight queens problem, asks how to place eight queens on a chessboard without attacking each other. If you never played chess before, a queen can move in any direction (horizontally, vertically and diagonally) any number of places. In the next figure, you can see two queens with their attack patterns:

At the end of the article we present a Python 3 solution to the eight queens puzzle.
We can generate a solution to the problem by scanning each row of the board and placing one queen per column, while checking at every step, that no two queens are in the line of attack of the other. A brute force approach to the problem will be to generate all possible combinations of the eight queens on the chessboard and reject the invalid states. How many combinations of 8 queens on a 64 cells chessboard are possible ?
The combinations formula is
\[C(n,k)=_nC_k=\frac{n!}{k!\cdot(n-k)!}\]which, for our particular case is:
\[C(64,8)=_{64}C_8=\frac{64!}{8!\cdot(64-8)!}=4,426,165,368\]Barnsley Fern in Python 3
Posted on November 2, 2017 by Paul
In this article, I will show you how to render the Barnsley Fern in Python 3. The Barnsley Fern is a fractal that can be generated using four simple affine transformations of the form:
\[{w_{i}}(x) = \begin{bmatrix}a_{i} & b_{i} \\c_{i} & d_{i} \end{bmatrix}\cdot \begin{bmatrix}x_{1}\\ x_{2}\end{bmatrix}+\begin{bmatrix}e_{i}\\ f_{i}\end{bmatrix} = {A_{i}} \cdot x + {t_{i}}\]where the coefficients of the transform are:
| w | a | b | c | d | e | f | p |
| 1 | 0 | 0 | 0 | 0.16 | 0 | 0 | 0.01 |
| 2 | 0.85 | 0.04 | -0.04 | 0.85 | 0 | 1.6 | 0.85 |
| 3 | 0.2 | -0.26 | 0.23 | 0.22 | 0 | 1.6 | 0.07 |
| 4 | -0.15 | 0.28 | 0.26 | 0.24 | 0 | 0.44 | 0.07 |
In the above table p represents the probability factor for a transform. For example, the second transform will be used 85% of times, third transform 7% and so on.
From a practical point of view, the Barnsley Fern is generated starting with an initial point \({x_{1}}\), \((0, 0)\), and iteratively calculating the next point \({x_{i}}\) using one of the above \({w_{i}}\) transforms.
At each step, we generate a random number r from the interval [0, 1) and, interpreting this number as a probability, we pick the corresponding transform. For example, if r is in the interval \([0, 0.01]\) we pick \({w_{1}}\), if r is in the interval \((0.01 + 0.85, 0.01 + 0.85 + 0.07]\) we pick \({w_{3}}\) and so on. Note, we define the intervals using the cumulative sum of the probability factors.
This is the result, after 1000000 iterations:

PPM image from scratch in Python 3
Posted on October 25, 2017 by Paul
Someone asked me if it is possible to write image files in pure Python, without any libraries. The answer is, of course, you can implement any image format in pure Python, as long as you have a clear description of the image format and you know how to write binary files.
In this article, I will show you how to write binary PPM images in pure Python. Linux and recent versions of macOS have native support for PPM files, so you can open a PPM image using the default OS image viewer. For Windows, you can use a program like IrfanView. The PPM file format can store uncompressed RGB images in binary or human readable, ASCII format. As a side note, the PPM format is not an efficient format to store images, however it is relatively easy to implement and use, from a programming point of view.
Building GCC 8 on Chrome OS
Posted on October 5, 2017 by Paul
Updated 19 August 2018
This is a short introduction on how to build GCC 8 from sources on your Chromebook or Chrome OS device. I’ve tested the procedure on an Intel based Chromebook with 4GB of RAM. In principle, same approach should work on an ARM device. I assume that you’ve enabled the Developer Mode on your Chrome OS device.
In order to be able to build GCC 8, you will need a C++ compiler. You can install an older compiler toolchain from Chromebrew, for more details read my previous article or, if you prefer the short version, open a shell tab and write the next commands:
1 shell
2 wget -q -O - https://raw.github.com/skycocker/chromebrew/master/install.sh | bash
3 crew install buildessential
4 crew install autconf
5 crew install automake
At this point, you should have GCC 4.9 installed on your machine. We will use the older 4.9 to compile GCC 8.
Chrome OS native development
Posted on September 13, 2017 by Paul
Today is the third day of my Two weeks programming on a Chromebook challenge. For the first two days I’ve played with enabling the Developer Mode on my Chromebook and installing Crouton and GCC 7 for C++17 development. Running Chrome OS and Crouton side by side is the easiest path for a complete Unix like development experience.
I think it could be interesting and more challenging for me personally, to investigate if I could do native Chrome OS development. By native I mean using only applications that run directly on Chrome OS or can be compiled to run on Chrome OS. Using a separate OS is not an option!
C++ local development on a Chromebook or Chrome OS device
Posted on September 11, 2017 by Paul
In this article, from my Two weeks programming on a Chromebook challenge, I will show you how to install locally a modern C++ development environment on your Chromebook.
Please make sure that you have Developer Mode enabled. If you want to be able to use a modern C++, like the one included with GCC 7, I suggest you to install Crouton using a CLI only install or using the LXDE desktop environment. My suggestion is to use the LXDE approach, unless you are Linux veteran and prefer to do your development from command line only.