My two weeks programming on a Chromebook challenge
Posted on September 11, 2017 by Paul
- Introduction
- Chromebook Developer Mode
- Crouton Ubuntu CLI
- Crouton Ubuntu LXDE
- Crouton Ubuntu C++17 development using GCC 7
- Chromebrew a Chrome OS package manager
- Chrome OS native development
- Conclusions
A few days ago, I bought a Chromebook for testing purposes. I was curious to see if it is possible to use it as a general development machine. My challenge is to use only the Chromebook and my iPhone for the next two weeks. I’m allowed to use local or external servers as long as I access these from my Chromebook.
In its default configuration, a Chromebook is not a developer machine. Chromebook was designed to be used as a cloud connected device, that can be used occasionally offline. The machine has a strong emphasis on security and ease of use for Internet related tasks: browsing, writing documents, email and so on.
If all you need is to develop simple HTML5 applications, you can do this on the default Chromebook configuration, by installing a couple of Chrome OS applications: a text editor like Caret and the Web Server for Chrome. You won’t be able to use Node.js or any Node package manager, but you can write simple JavaScript programs.
You can obviously use the machine as a console, connected to a local or external server and do your development work online. If you have a fast and cheap Internet connection, you are always connected and you can afford to keep your data on a third party server, it is not a bad way to develop. Traditionally, this is how most Chromebook developers have used the machine.
If you don’t like to mess around with web server administrative tasks, you could use cloud services like Codeanywhere or Cloud9. Personally, for online development, I prefer a more hands on approach, where I use a medium size VPS from DigitalOcean.
A more radical approach is to wipe Chrome OS and replace it with a Linux distribution like GalliumOS. While a valid approach, personally I’m not interested in removing Chrome OS from my Chromebook.
The solution I use, for now, on my machine, for offline development is to run Ubuntu Linux in a chroot through Crouton. The advantage of this approach is that you can run Ubuntu and Chrome OS side by side. You can run Ubuntu applications in a Chrome OS tab or full screen. If you work full screen, you can simply switch between Chrome OS and Ubuntu with the push of a button. Please note that in order to use Crouton, you need to put your Chromebook in Developer Mode which disables some of the default security provided by Chrome OS. You can read about this here.
Disclaimer: Before enabling the Developer Mode on your Chromebook, backup all the files you have in your Downloads folder. When you enable Developer Mode your personal files will be wiped out and you will need to sign in again on your Chromebook.
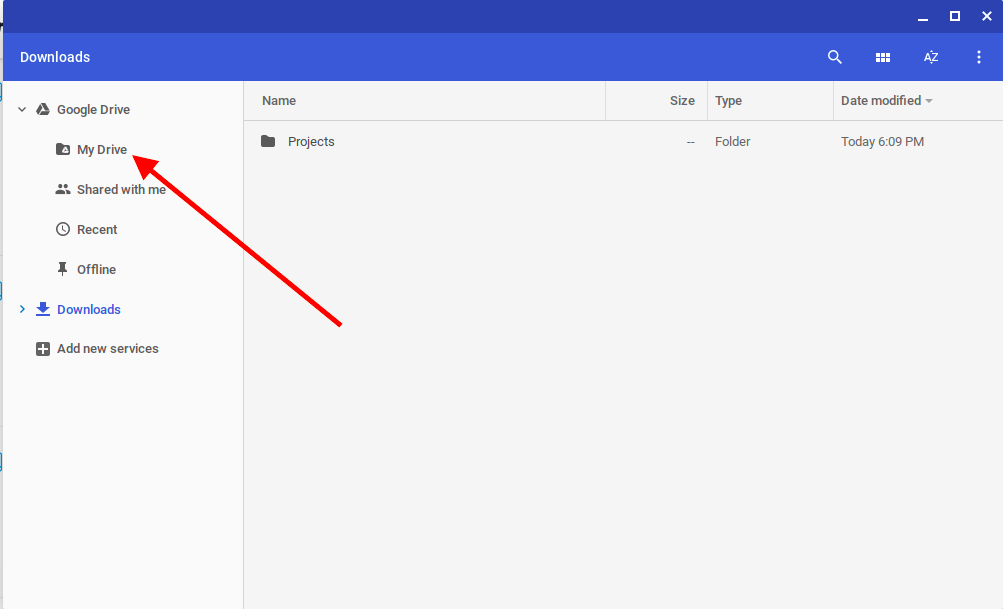
If you want to backup a file or a folder move it to My Drive:
On most Chromebooks, you can enable the Developer mode by pressing and holding the Esc+Refresh keys and tapping the Power button. Next, you should see a scary message: Chrome OS is missing. Press CTRL+D to continue and follow the on screen messages. Once your Chromebook reboots, you should see something like this:
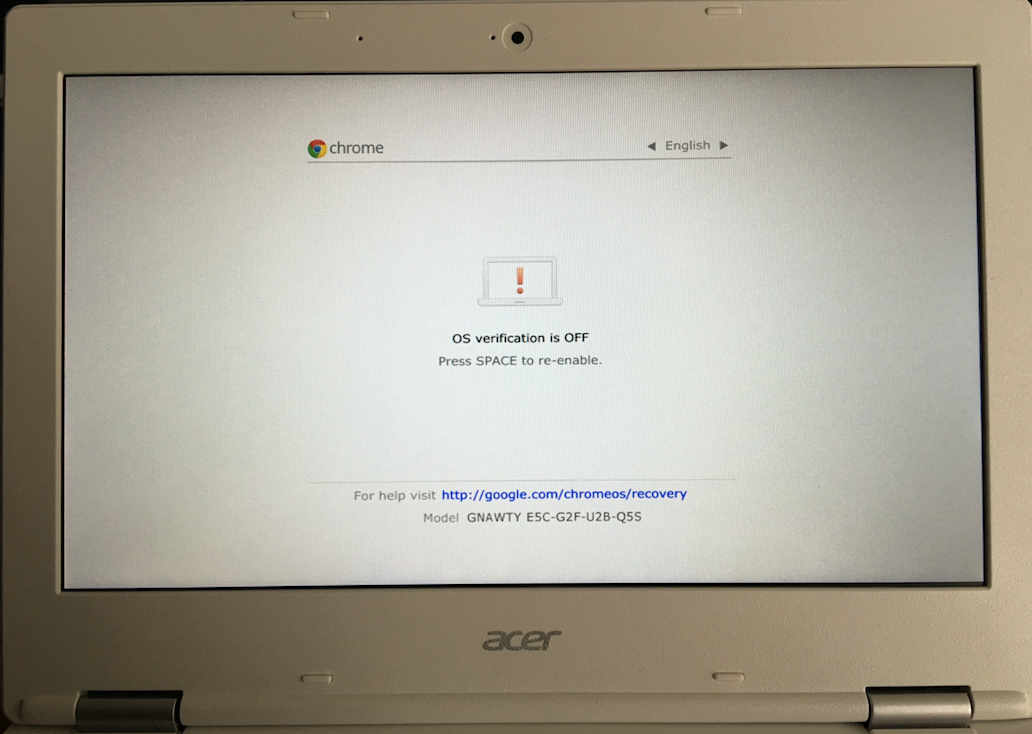
Do not press the SPACE key!
If you press the SPACE key, you will revert back to normal mode and wipe out your Chromebook. If you wait a few seconds, your Chromebook will beep twice and boot in Developer Mode. You can bypass the annoying beeps and start faster by pressing CTRL+D. You probably guessed by now that if you want to reset your Chromebook to the initial normal user state, you simply restart the machine and press SPACE (don’t forget to backup your files).
Next, install the Crouton Integration app and download the Crouton installer.
In Chrome, you can open a Terminal tab by pressing CTRL+ALT+T. This will put you at a crosh prompt. Write shell and press Enter:
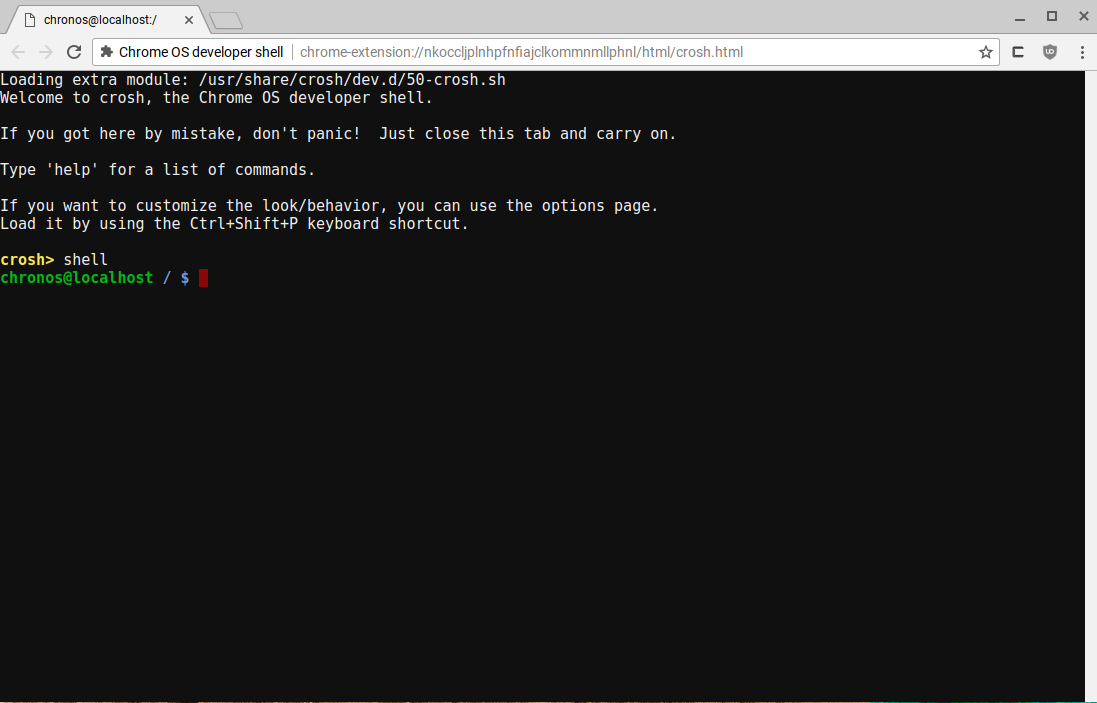
This is a normal Bash shell provided by Chrome OS. By default you have vim, wget, curl and a few other utilities. It is a limited selection of the typical Linux CLI applications.
The Crouton script allows us to select from a few Linux distributions and a few desktop environments. By default, Crouton will install the LTS Ubuntu version, which is 16.04 at the time of this writing.
You can check what target environments are available with:
1 sudo sh ~/Downloads/crouton -t listIf all you need is a minimal CLI (no graphical applications) version of Ubuntu, which has the advantage that takes little space on your Chromebook, you can install it with:
1 sudo sh ~/Downloads/crouton coreWhen you need to use a CLI tool from Ubuntu, all you have to do is to open a shell tab, as presented previously, and write:
1 sudo enter-chrootafter which, you will be at a normal Ubuntu CLI prompt, that runs in a Chrome tab, and you can install anything you need using the apt package manager.
If you want to run any graphical applications like Gimp, Visual Studio Code, you will need more than the core environment. For example, the next command will install the LXDE desktop environment with two backends xiwi and xorg:
1 sudo sh ~/Downloads/crouton lxde,xiwi,xorgxiwi provides the X.org X11 backend running unaccelerated in a Chrome OS window, while xorg enables GPU acceleration on supported platforms.
You can read more about xiwi on the Crouton wiki. This lets you run graphical applications in Chrome, without graphical acceleration. xiwi runs on all Chromebooks and it lets you run GUI apps in a Chrome tab or full screen, allows copy/paste between the two systems. It is not a good choice, if you want to play a game or if you want to do OpenGL programming.
This is how to start LXDE with the xiwi backend:
1 sudo startlxde -X xiwixorg on the other hand will give you GPU acceleration, if supported on your Chromebook model. For example, on my device I get OpenGL 3.3. It is generally faster than xiwi and it is a good choice if you intend to run Ubuntu full screen for graphical intensive applications.
This is how to start LXDE with the xorg backend:
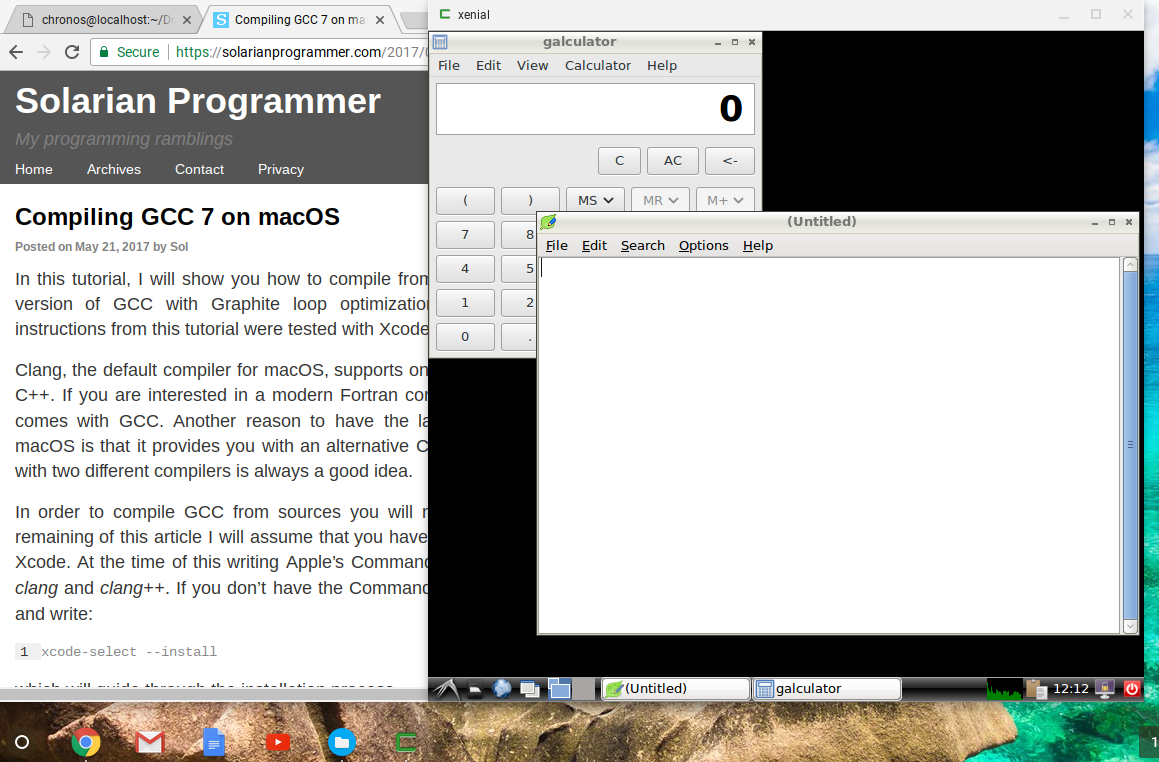
1 sudo startlxde -X xorgHere is a screenshot of Chrome and Ubuntu LXDE side by side on my Chromebook. LXDE runs on the xiwi backend:
I would recommend reading the Crouton Command Cheat Sheet.
Chromebrew a Chrome OS package manager:
An alternative to installing a separate OS side by side Chrome OS is to use Chromebrew. Chromebrew is a package manager for Chrome OS, currently it is CLI only. If you are lucky and you find what you need in the Chromebrew packages, you don’t need to install a full OS. For example, if all you need is Vim and the Go programming language, you can use Chromebrew.
Please note, that you don’t need Crouton if you plan to use Chromebrew!
First, make sure that your Chromebook is in Developer Mode.
Next, open a shell tab and install Chromebrew with:
1 wget -q -O - https://raw.github.com/skycocker/chromebrew/master/install.sh | bashAt this point, you can use the crew command to search and install applications. E.g. of usage:
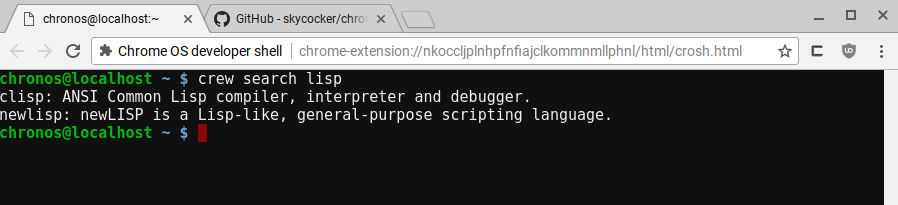
1 crew search lispThis is what I see on my machine:
Now, you can install, if you need a Common Lisp compiler, clisp with:
1 crew install clisp,ncursesIf you want to read more, I wrote a more detailed article about Chrome OS native development.
The main conclusion of my Chrombook challenge is that you can, in principle, do programming work on a modern Chromebook. If you are used to more powerful machines you will probably want to buy a beefier Chrome OS device, like the new PixelBook from Google. For beginners, as long as you can enable the developer mode on the machine, a Chromebook is good development machine.