C++ reading and writing BMP images
Posted on November 19, 2018 by Paul
In this article, I will show you how to implement a BMP image loader from scratch in C++. BMP is one of the oldest image formats on the Windows platform and it is supported on most other operating systems. BMP can store two-dimensional raster images with optional compression and transparency. In this article, we will implement a simplified version of the BMP format specification that will support only 24 and 32 bits depth images in the BGR and BGRA color spaces. To make our life simpler we can also ignore the, optional, compression component.
Even if you don’t plan to use BMP images, it is still a useful programming exercise to write a BMP reader/writer in C++.
From a programming point of view, a BMP file is a binary file in the little-endian format. For our purposes, we can divide a BMP image in four regions:
- file header - all BMP images starts with a five elements file header. This has information about the file type, file size and location of the pixel data.
- bitmap header - also named the info header. This has information about the width/height of the image, bits depth and so on.
- color header - contains informations about the color space and bit masks
- pixel data.
It is probably easier to show you directly the code for the file header:
1 struct BMPFileHeader {
2     uint16_t file_type{0x4D42};          // File type always BM which is 0x4D42
3     uint32_t file_size{0};               // Size of the file (in bytes)
4     uint16_t reserved1{0};               // Reserved, always 0
5     uint16_t reserved2{0};               // Reserved, always 0
6     uint32_t offset_data{0};             // Start position of pixel data (bytes from the beginning of the file)
7 };
The last field of the above structure represents the position, in bytes, from the start of the file to where the pixel data is stored.
If you want to read the header using the above structure, you’ll need to keep in mind that a compiler is free to add padding to a struct to align the data for a particular machine. With most modern C++ compilers (e.g. GCC, Clang, MSVC, Intel) you can use the next pragma pack syntax to ask for a specific alignment:
1 #pragma pack(push, 1)
2
3 // ... your packed structures
4
5 #pragma pack(pop)
Without pragma pack the above struct takes 16 bytes on my machine, with the pragma pack instructions, same struct takes 14 bytes. You can obviously chose to read every field of the struct separately and avoid the padding problem, but it is more cumbersome and error prone.
The second region of a BMP file can be described by the next structure:
 1 struct BMPInfoHeader {
 2     uint32_t size{ 0 };                      // Size of this header (in bytes)
 3     int32_t width{ 0 };                      // width of bitmap in pixels
 4     int32_t height{ 0 };                     // width of bitmap in pixels
 5                                              //       (if positive, bottom-up, with origin in lower left corner)
 6                                              //       (if negative, top-down, with origin in upper left corner)
 7     uint16_t planes{ 1 };                    // No. of planes for the target device, this is always 1
 8     uint16_t bit_count{ 0 };                 // No. of bits per pixel
 9     uint32_t compression{ 0 };               // 0 or 3 - uncompressed. THIS PROGRAM CONSIDERS ONLY UNCOMPRESSED BMP images
10     uint32_t size_image{ 0 };                // 0 - for uncompressed images
11     int32_t x_pixels_per_meter{ 0 };
12     int32_t y_pixels_per_meter{ 0 };
13     uint32_t colors_used{ 0 };               // No. color indexes in the color table. Use 0 for the max number of colors allowed by bit_count
14     uint32_t colors_important{ 0 };          // No. of colors used for displaying the bitmap. If 0 all colors are required
15 };
From the above we need to consider only the width, height, bit_count and compression. The compression is set to 0 for images with 24 bits per pixel and 3 for images with 32 bits per pixel.
The third region of can be described by:
1 struct BMPColorHeader {
2     uint32_t red_mask{ 0x00ff0000 };         // Bit mask for the red channel
3     uint32_t green_mask{ 0x0000ff00 };       // Bit mask for the green channel
4     uint32_t blue_mask{ 0x000000ff };        // Bit mask for the blue channel
5     uint32_t alpha_mask{ 0xff000000 };       // Bit mask for the alpha channel
6     uint32_t color_space_type{ 0x73524742 }; // Default "sRGB" (0x73524742)
7     uint32_t unused[16]{ 0 };                // Unused data for sRGB color space
8 };
The color masks are initialized to BGRA format and are only used for images with transparency (32 bits depth in our case).
A peculiarity of the BMP image format is that, if the height is negative, you have the origin of the image in the top left corner. If the height is a positive number, the origin of the image is at the bottom left corner. For simplicity, we will consider only the case when the image height is a positive number and the origin is always in the bottom left corner.
The BMP image format expects every row of data to be aligned to a four bytes boundary or padded with zero if this is not the case. For a 32 bits per pixel image the alignment condition is always satisfied. In the case of a 24 bits per pixel images, the alignment is satisfied only if the image width is divisible by 4, otherwise we’ll need to pad the rows with zeros.
Using the above two structs we can define a new BMP struct that can read/write a BMP image from disk, create a BMP object in memory, modify the pixel data and so on …
A possible implementation could look like this:
 1 struct BMP {
 2     BMPFileHeader file_header;
 3     BMPInfoHeader bmp_info_header;
 4     BMPColorHeader bmp_color_header;
 5     std::vector<uint8_t> data;
 6
 7     BMP(const char *fname) {
 8         read(fname);
 9     }
10
11     void read(const char *fname) {
12     	// ...
13     }
14
15     BMP(int32_t width, int32_t height, bool has_alpha = true) {
16     	// ...
17     }
18
19     void write(const char *fname) {
20     	// ...
21     }
22
23 private:
24     // ...
25 };
Suppose that we want to be able to read, write and directly modify the pixel data of a BMP image, something like in the next code:
 1 #include "BMP.h"
 2
 3 int main() {
 4     // Read an image from disk, modify it and write it back:
 5     BMP bmp("Shapes.bmp");
 6     bmp.write("Shapes_copy.bmp");
 7
 8     // Create a BMP image in memory:
 9     BMP bmp2(800, 600);
10
11     // Modify the pixel data:
12     // ....
13
14     // Save the image:
15     bmp2.write("test.bmp");
16
17     // Create a 24 bit per pixel image (BGR colors) and save it
18     BMP bmp3(209, 203, false);
19     // ...
20     bmp3.write("test_24bits.bmp");
21 }
Please note that bmp3 from the above code has a width of 209 pixel, which means it will need padding with zeros to align the rows to a 4 bytes boundary.
For testing purposes we’ll use a few images Shapes.bmp, Shapes-24.bmp, t1-24.bmp, t2-24.bmp please use the above links if you want to download the images in BMP format. The first image looks like this:
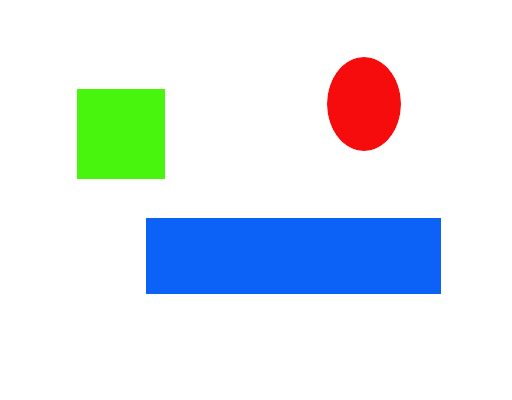
We’ll start by writing the code that loads the image from disk. Please note, that this is not intended to read all BMP image variations. It will work only with 32 or 24 bits per pixel, uncompressed, images in the format BGRA or BGR. I’ve tested the code with BMP images generated with GIMP, Paint.NET and Microsoft Paint.
In order to read the image, we need to open the image as a binary file, read the headers, use the image size information to resize the data vector and finally read the pixel data. In case the data was padded with zeros we need to read these too and discard the padding data. Some editors will add extra information in the file that we can safely ignore, we just need to adjust header and file size for this. This is necessary in case the user decides to save the processed image.
 1 struct BMP {
 2     // ...
 3
 4     void read(const char *fname) {
 5         std::ifstream inp{ fname, std::ios_base::binary };
 6         if (inp) {
 7             inp.read((char*)&file_header, sizeof(file_header));
 8             if(file_header.file_type != 0x4D42) {
 9                 throw std::runtime_error("Error! Unrecognized file format.");
10             }
11             inp.read((char*)&bmp_info_header, sizeof(bmp_info_header));
12
13             // The BMPColorHeader is used only for transparent images
14             if(bmp_info_header.bit_count == 32) {
15                 // Check if the file has bit mask color information
16                 if(bmp_info_header.size >= (sizeof(BMPInfoHeader) + sizeof(BMPColorHeader))) {
17                     inp.read((char*)&bmp_color_header, sizeof(bmp_color_header));
18                     // Check if the pixel data is stored as BGRA and if the color space type is sRGB
19                     check_color_header(bmp_color_header);
20                 } else {
21                     std::cerr << "Warning! The file \"" << fname << "\" does not seem to contain bit mask information\n";
22                     throw std::runtime_error("Error! Unrecognized file format.");
23                 }
24             }
25
26             // Jump to the pixel data location
27             inp.seekg(file_header.offset_data, inp.beg);
28
29             // Adjust the header fields for output.
30             // Some editors will put extra info in the image file, we only save the headers and the data.
31             if(bmp_info_header.bit_count == 32) {
32                 bmp_info_header.size = sizeof(BMPInfoHeader) + sizeof(BMPColorHeader);
33                 file_header.offset_data = sizeof(BMPFileHeader) + sizeof(BMPInfoHeader) + sizeof(BMPColorHeader);
34             } else {
35                 bmp_info_header.size = sizeof(BMPInfoHeader);
36                 file_header.offset_data = sizeof(BMPFileHeader) + sizeof(BMPInfoHeader);
37             }
38             file_header.file_size = file_header.offset_data;
39
40             if (bmp_info_header.height < 0) {
41                 throw std::runtime_error("The program can treat only BMP images with the origin in the bottom left corner!");
42             }
43
44             data.resize(bmp_info_header.width * bmp_info_header.height * bmp_info_header.bit_count / 8);
45
46             // Here we check if we need to take into account row padding
47             if (bmp_info_header.width % 4 == 0) {
48                 inp.read((char*)data.data(), data.size());
49                 file_header.file_size += data.size();
50             }
51             else {
52                 row_stride = bmp_info_header.width * bmp_info_header.bit_count / 8;
53                 uint32_t new_stride = make_stride_aligned(4);
54                 std::vector<uint8_t> padding_row(new_stride - row_stride);
55
56                 for (int y = 0; y < bmp_info_header.height; ++y) {
57                     inp.read((char*)(data.data() + row_stride * y), row_stride);
58                     inp.read((char*)padding_row.data(), padding_row.size());
59                 }
60                 file_header.file_size += data.size() + bmp_info_header.height * padding_row.size();
61             }
62         }
63         else {
64             throw std::runtime_error("Unable to open the input image file.");
65         }
66     }
67
68     // ...
69
70 private:
71     // ...
72
73     // Check if the pixel data is stored as BGRA and if the color space type is sRGB
74     void check_color_header(BMPColorHeader &bmp_color_header) {
75         BMPColorHeader expected_color_header;
76         if(expected_color_header.red_mask != bmp_color_header.red_mask ||
77             expected_color_header.blue_mask != bmp_color_header.blue_mask ||
78             expected_color_header.green_mask != bmp_color_header.green_mask ||
79             expected_color_header.alpha_mask != bmp_color_header.alpha_mask) {
80             throw std::runtime_error("Unexpected color mask format! The program expects the pixel data to be in the BGRA format");
81         }
82         if(expected_color_header.color_space_type != bmp_color_header.color_space_type) {
83             throw std::runtime_error("Unexpected color space type! The program expects sRGB values");
84         }
85     }
86 };
For saving the image to disk we consider only the 24 and 32 bits per pixel case.
In the 24 bits per pixel case, if the width is divisible by 4, we write the data just like for the 32 bits per pixel case. If the width is not divisible by 4, we increase the row stride, by adding 1 repeatedly, until it is divisible by 4. We fill a padding vector with zeros that will be used at the end of each line. We modify the bitmap headers to take into account the new file size and write the headers like in the previous cases. The data vector is written one row at a time: we write a row, we write the padding data, we write the next row and so on …
Here is the code for writing the image to disk:
 1 struct BMP {
 2     // ...
 3
 4     void write(const char *fname) {
 5         std::ofstream of{ fname, std::ios_base::binary };
 6         if (of) {
 7             if (bmp_info_header.bit_count == 32) {
 8                 write_headers_and_data(of);
 9             }
10             else if (bmp_info_header.bit_count == 24) {
11                 if (bmp_info_header.width % 4 == 0) {
12                     write_headers_and_data(of);
13                 }
14                 else {
15                     uint32_t new_stride = make_stride_aligned(4);
16                     std::vector<uint8_t> padding_row(new_stride - row_stride);
17
18                     write_headers(of);
19
20                     for (int y = 0; y < bmp_info_header.height; ++y) {
21                         of.write((const char*)(data.data() + row_stride * y), row_stride);
22                         of.write((const char*)padding_row.data(), padding_row.size());
23                     }
24                 }
25             }
26             else {
27                 throw std::runtime_error("The program can treat only 24 or 32 bits per pixel BMP files");
28             }
29         }
30         else {
31             throw std::runtime_error("Unable to open the output image file.");
32         }
33     }
34
35 private:
36     uint32_t row_stride{ 0 };
37
38     void write_headers(std::ofstream &of) {
39         of.write((const char*)&file_header, sizeof(file_header));
40         of.write((const char*)&bmp_info_header, sizeof(bmp_info_header));
41         if(bmp_info_header.bit_count == 32) {
42             of.write((const char*)&bmp_color_header, sizeof(bmp_color_header));
43         }
44     }
45
46     void write_headers_and_data(std::ofstream &of) {
47         write_headers(of);
48         of.write((const char*)data.data(), data.size());
49     }
50
51     // Add 1 to the row_stride until it is divisible with align_stride
52     uint32_t make_stride_aligned(uint32_t align_stride) {
53         uint32_t new_stride = row_stride;
54         while (new_stride % align_stride != 0) {
55             new_stride++;
56         }
57         return new_stride;
58     }
59
60     // ...
61 };
At this point, you can read and write a BMP file.
Next, we can write the code for creating a BMP image in memory. For this, like before, we consider only images with 24 and 32 bits per pixel. By default, the image will have 32 bits per pixel, unless the user passes false to the has_alpha parameter. The constructor needs to set the width and height for the image, the header sizes, the file size, the offset data (the position at which the pixel data is written in the file), the bits per pixel count, the compression type and resize the data vector to accommodate the image size:
 1 struct BMP {
 2     // ...
 3
 4     BMP(int32_t width, int32_t height, bool has_alpha = true) {
 5         if (width <= 0 || height <= 0) {
 6             throw std::runtime_error("The image width and height must be positive numbers.");
 7         }
 8
 9         bmp_info_header.width = width;
10         bmp_info_header.height = height;
11         if (has_alpha) {
12             bmp_info_header.size = sizeof(BMPInfoHeader) + sizeof(BMPColorHeader);
13             file_header.offset_data = sizeof(BMPFileHeader) + sizeof(BMPInfoHeader) + sizeof(BMPColorHeader);
14
15             bmp_info_header.bit_count = 32;
16             bmp_info_header.compression = 3;
17             row_stride = width * 4;
18             data.resize(row_stride * height);
19             file_header.file_size = file_header.offset_data + data.size();
20         }
21         else {
22             bmp_info_header.size = sizeof(BMPInfoHeader);
23             file_header.offset_data = sizeof(BMPFileHeader) + sizeof(BMPInfoHeader);
24
25             bmp_info_header.bit_count = 24;
26             bmp_info_header.compression = 0;
27             row_stride = width * 3;
28             data.resize(row_stride * height);
29
30             uint32_t new_stride = make_stride_aligned(4);
31             file_header.file_size = file_header.offset_data + data.size() + bmp_info_header.height * (new_stride - row_stride);
32         }
33     }
34
35     // ...
36 };
The only part that remains to be implemented is the modify pixel data part. A quick and dirty approach, without error checking, is to fill a rectangular region from the image with a particular color. For example, we could write:
 1 #include "BMP.h"
 2
 3 int main() {
 4     // ...
 5     BMP bmp2(800, 600);
 6
 7     // Modify the pixel data:
 8     int channels = bmp2.bmp_header.bit_count / 8;
 9     for(int y =20; y < 220; ++y) {
10         for(int x = 50; x < 150; ++x) {
11             bmp2.data[channels * (y * bmp2.bmp_header.width + x) + 0] = 0;   // B
12             bmp2.data[channels * (y * bmp2.bmp_header.width + x) + 1] = 0;   // G
13             bmp2.data[channels * (y * bmp2.bmp_header.width + x) + 2] = 255; // R
14             if(channels == 4) {
15                 bmp2.data[channels * (y * bmp2.bmp_header.width + x) + 3] = 255; // A
16             }
17         }
18     }
19
20     // Save the image:
21     // ...
22 }
The above will fill with Red a rectangular region from bmp2.
A better idea is to refactor the above code into a member function of the BMP struct:
 1 struct BMP {
 2     // ...
 3
 4     void fill_region(uint32_t x0, uint32_t y0, uint32_t w, uint32_t h, uint8_t B, uint8_t G, uint8_t R, uint8_t A) {
 5         if (x0 + w > (uint32_t)bmp_info_header.width || y0 + h > (uint32_t)bmp_info_header.height) {
 6             throw std::runtime_error("The region does not fit in the image!");
 7         }
 8
 9         uint32_t channels = bmp_info_header.bit_count / 8;
10         for (uint32_t y = y0; y < y0 + h; ++y) {
11             for (uint32_t x = x0; x < x0 + w; ++x) {
12                 data[channels * (y * bmp_info_header.width + x) + 0] = B;
13                 data[channels * (y * bmp_info_header.width + x) + 1] = G;
14                 data[channels * (y * bmp_info_header.width + x) + 2] = R;
15                 if (channels == 4) {
16                     data[channels * (y * bmp_info_header.width + x) + 3] = A;
17                 }
18             }
19         }
20     }
21
22 private:
23     // ...
24 };
Now, we can rewrite the main function:
 1 #include "BMP.h"
 2
 3 int main() {
 4     // Read an image from disk and write it back:
 5     BMP bmp("Shapes.bmp");
 6     bmp.write("Shapes_copy.bmp");
 7
 8     // Create a BMP image in memory, modify it, save it on disk
 9     BMP bmp2(800, 600);
10     bmp2.fill_region(50, 20, 100, 200, 0, 0, 255, 255);
11     bmp2.write("img_test.bmp");
12
13     // Create a 24 bits/pixel BMP image in memory, modify it, save it on disk
14     BMP bmp3(209, 203, false);
15     bmp3.fill_region(50, 20, 100, 100, 255, 0, 255, 255);
16     bmp3.write("img_test_24bits.bmp");
17 }
You can find the complete source code on the GitHub repository for this article.
If you are interested to learn more about modern C++ I would recommend reading A tour of C++ by Bjarne Stroustrup.

or Effective Modern C++ by Scott Meyers.